
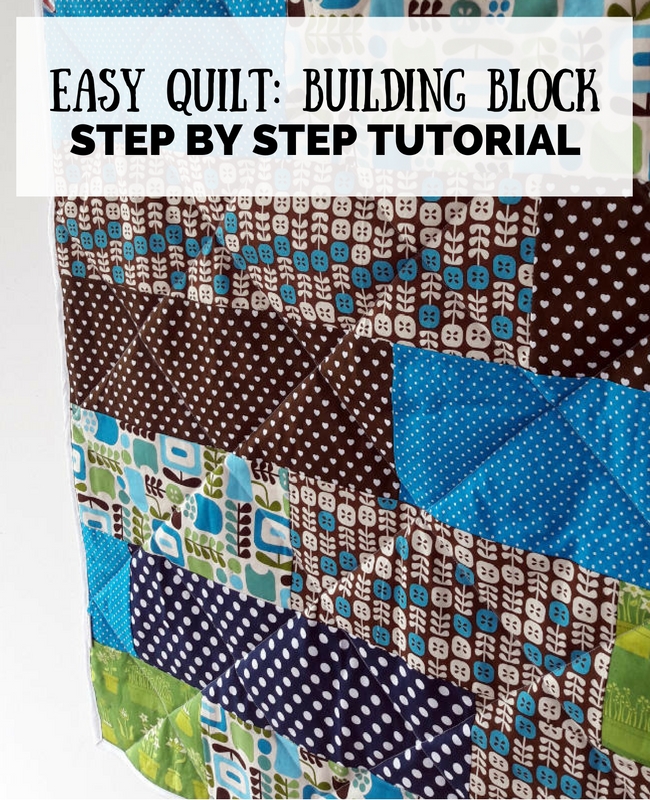
Het resultaat is een simpele vierkanten kinder quilt die ik de 'building block quilt' heb gedoopt, omdat het lijkt alsof hij uit bouwstenen/ legostenen is opgebouwd. Mocht je een keer een simpele quilt willen proberen te maken, dan leg ik je hieronder uit hoe ik te werk ben gegaan.
The result is a simple, square children's quilt that I have named the Building Block Quilt, because it looks like it was made up by bricks or Lego blocks. If you feel like trying a simple quilt sometimes, I'll show you the steps that I took, to mak it a little easier for you.
Wat heb je nodig:
- Stoffen, allemaal van hetzelfde gewicht! Ik werkte met restjes, maar met 5-6 fat quarters (50x50cm) ga je al een heel eind komen.
- Een snijmat, ik heb er één van Prym.
- Een quilt lineaal: ik heb er één van 15x60 cm gebruikt.
- Een stofsnijder. Die van mij vond ik niet heel je-dat (het wieltje zat te los, ofzo), maar Prym heeft goede rolmessen en ik hoorde dat het Olfa rolmes ook een topper is.
- Voering van 1 meter in het vierkant: dat kan echte quilt batting zijn, maar een lap fleece kan ook.
- Lap voor de achterkant, van 1 meter in het vierkant.
- 5 beter brede biais tape, die kun je zelf maken, maar ook kant en klaar kopen.
- Héél veel spelden en veiligheidsspelden
- Kleermakerskrijt
- Strijkijzer en strijkplank
- Je naaimachine en naaispullen

What do you need
- Fabrics, all of the same weight. I worked with some bits and bobs that I still had, but I think 5-6 fat quarters will be quite enough for the top.
- A cutting mat, I have one by Prym
- A cutting knife. I didn't like mine much (something with the wheel being too lose or something), but Prym has good rolling knives, and the Olfa comes recommend to me.
- A quilting ruler, I have used one of 15x60 cm.
- Batting of 100 x 100 cm. You can use official quilting batting, but you can also buy some fleece.
- Fabric for the bag: 100 x 100 cm.
- 5 meters of wide biastape, you can make this but also buy it of course.
- Loads of pins and safety pins.
- Chalk
- Iron and ironing board.
- Your sewing machine and sewing gear.
Let's get started!
We gaan stroken knippen die 15 centimeter hoog zijn. Elke strook zal uit 3 blokken bestaan en opgeteld moet een strook 90 cm breed zijn. Hieronder zie je welke breedtes ik heb aangehouden. Maar je kunt hier natuurlijk creatief in zijn. Door de stoffen op je mat te leggen, langs de lange lineaal blijf je mooi recht.
I am going to explain this quilt tutorial in centimeters, if you'd rather be working in inches, I recommend THIS WEBSITE to go from cm to inch.
We'll be cutting strips that are 15 cm high. Every strip has 3 blocks if you add up with widts it should add up to 90 cm. Here you can see which measurements I took for my blocks. By putting your fabrics on the mat and using your ruler and cutter, you'll keep the lines nice and straight.


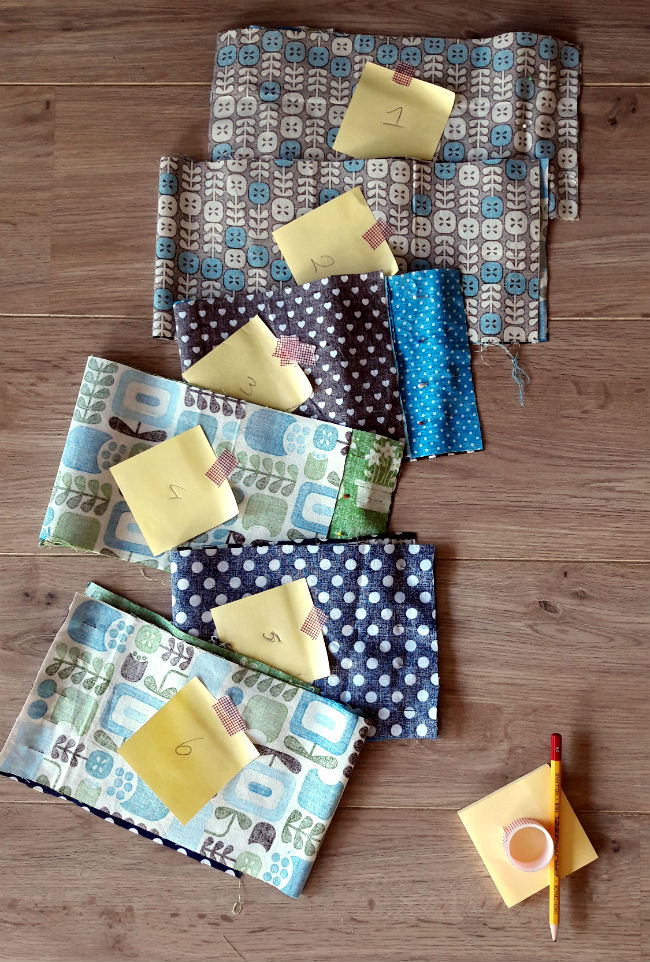
Speld de 3 blokken per strook aan elkaar, goede kanten op elkaar. Ik heb in totaal 6 stroken gemaakt en heb op elke strook een nummertje geplakt, zodat ik weet in welke volgorde ik ze later aan elkaar moet naaien. Nu ga je de blokken per strip stikken. Ik heb de breedte van het voetje van mijn naaimachine aangehouden als naadtoeslag, zodat ik mijn voetje als geleider kon gebruiken en alles mooi recht zou blijven. Nadat je de blokken aan elkaar hebt genaaid strijk je de naden plat.

Pin the 3 blocks per strip together, right sides together. In total I made 6 strips and I have numbered each strip so I would remember how to stitch them together later on. You'll be stitching the blocks together for every strip. Now for seam allowance I used the exact width or my sewing foot. That way I could use the foot as a guide and all your seams will be nice and straight. Iron the seams flat after you're done.
Stitch the strips together
Leg strip 2 op 1, goede kanten op elkaar. Speld de onderkant aan elkaar vast en stik vast. Vouw open en strijk de naden plat. Herhaal door 3 op 2 te leggen, 4 op 3 etc. Als de stroken aan elkaar zijn gestikt strijk je nog eenmaal alle naden goed plat. Strijk ook de bovenkant, zodat alle vouwtjes eruit zijn.

Place strip 2 on 1, right sides together. Stitch the bottom and stitch. Fold open and iron the seams flat. Repeat this by placing 3 on 2, 4 on 3 etc. After stitching all the strips together, iron all the seams one more time, then iron the top to get rid of all the wrinkles.
Place the top on the batting
Leg je batting op je ondergrond (ik legde alles gewoon op de woonkamervloer, lekker veel ruimte om te werken). Zorg dat je vulling wat groter is in lengte en breedte. Leg je quilt top eroverheen en strijk hem met je hand mooi glad over de batting heen. Pak je spelden en speld de top langs de boven-, onder-, en zijkanten vast aan de batting.

Place your batting on your work surface (I used the living room floor, loads of space to work on! Make sure that your batting is a little larger than your quilt top. Place your quilt top on your batting, good side up, and make sure it's all nice and flat. Now, with a lot of pins, pin the batting to your top, along the top, bottom and sides.
Place the top and batting to the quilt back
Leg je quilt achterkant op je ondergrond, verkeerde kant naar boven. Het is handig als je quilt achterkant ook wat groter is dan je quilt top. Strijk het mooi glad en plaats je quilt top en batting erover heen. Strijk alles mooi glad en maak de drie lagen nu aan elkaar met heel veel veiligheidsspelden. Ik speldde langs de randen en maakte twee diagonalen.

Topstitching....
Om mijn leven wat gemakkelijker te maken (want waarom ook niet), besloot ik de 3 lagen schuin door te stikken. Ik gebruikte de breedte van mijn liniaal (15 cm) en trok diagonaal lijnen van de linker onderhoek naar de echter bovenhoek. En omdat ik zwaar paranoia ben en doodsbang was dat alle lagen toch zouden gaan schuiven of dubbel gaan zitten tijdens het doorstikken heb ik de quilt ook nog even ingeregen (met gewoon rijggaren) voordat ik de boel onder mijn machine gooide.
Tip! Zet een nieuwe naald in je machine voor je gaat doorstikken. Heb je een boventransport voetje bij je naaimachine, dan is het een goed idee om deze erop te zetten. Dit voetje druk alles lekker plat vlak voordat je er overheen stikt, een echte hulp bij het doorstikken van een quilt. Heb je zo'n voetje niet, geen nood: met een gewoon voetje kan het ook, zorg dan dat je niet al te snel stikt en alles goed plat drukt en geleid.
Nadat je dit hebt gedaan, is je quilt doorgestikt. Maar ben je overmoedig geraakt (zoals ik), dan kun je ook nog even lijnen trekken van de rechter onderhoek, naar de linker bovenhoek en doorstikken.
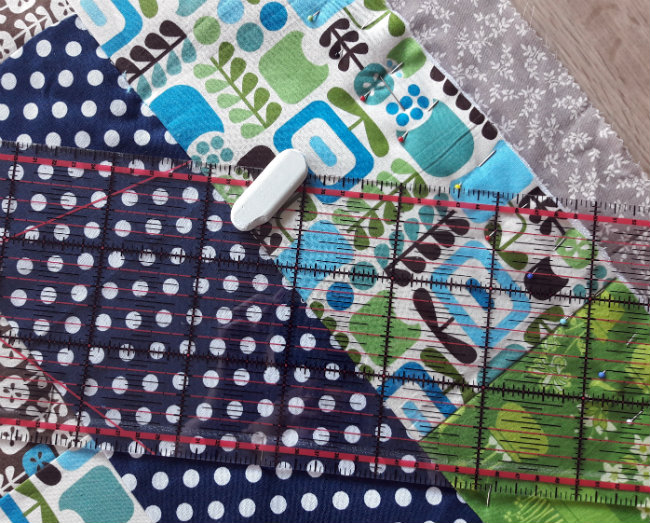

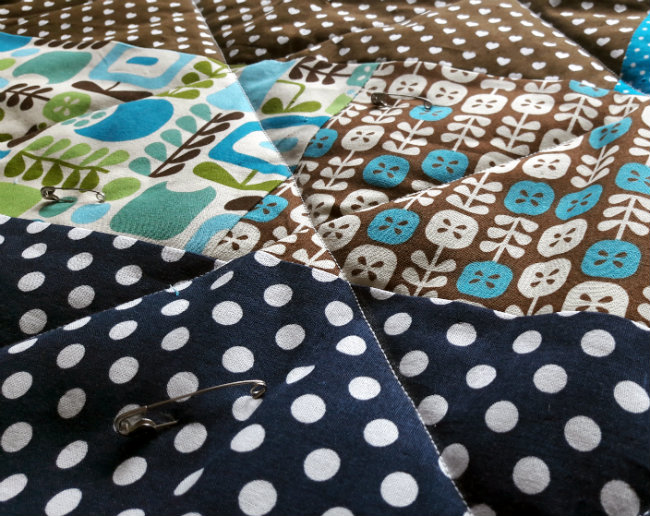
To make my life a little easier (because, why wouldn't I), I decided to topstitch the three layers diagonally and I used the width of my ruler (15 cm). I drew lines from the left bottom corner to the right top corner. And because I was completely paranoid and extremely anxious about the layers moving or layers puckering, I made some large stitches across with tacking cotton before top stitching.
Tip! Put a fresh needle into your machine before you stitch through. If you have a walkerfoot for your machine it's a good idea to put that in. The foor squishes the layers before you stitch is, so there's less chance of pesky puckering. If you don't have a walkerfoot, don't worry, your regular foot also does the trick nicely, just go slow.
After you've stitched through, your layers are sewin together and you're good. However, f you've gotten daring (like I was) you can decide to repeat the exercise for the other diagonal. So draw lines from the right bottom corner, to the left top corner using your ruler, and stitch again.
Zig zag around
Knip de overtollige batting en stof van de achterkant van je quilt rondom weg, zodat deze even groot zijn als je quilt top. Zigzag nu de randen van je quilt, dan zitten de lagen alvast goed op elkaar (ja, van mogelijk schuiven krijg ik hyperventilatie).
Trim all the access batting and fabric of the quilt back. Now they're the same size as the quilt top. Zig zag around the edges of the entire quilt, so all the layers are securely zig zagged together (yes, the idea of those layers maybe moving make me hyperventilate).
Finish with the binding
Als laatste stap ga je een bies om je quilt maken. Hiervoor gebruik je biaisband. Je werkt het lekkerst met een beetje brede biaisband, die van mij was (opengeklapt) 5,5 cm breed. Ik kocht kant-en-klare biaisband, want die is nog een beetje stug (van het stijfsel uit de fabriek denk ik) en ik vind dat fijn werken. Je kunt ook zelf biaisband maken, hier lees je hoe.
The last step is binding your quilt. You use biastape to do this. For this quilt I am working with rather wide biastape, all opened up it was 5.5 cm wide. I bought my biastape, it's nice and stiff (I think from the starch in the fcatory) and it's nice to work with that, or I think so. But you can of course make your own biastape. Here's a tutorial on how to do it.


Vouw je biaisband open en leg hem op de achterkant van je quilt. Begin ergens halverwege een zijkant van de quilt. Leg de biaisband tegen de rand van je quilt, goede kanten op elkaar. Speld vast en stik, tot zo'n 2 cm voor de hoek. Hecht af. Vouw je biaisband naar rechts, in een mooie hoek van 90 graden, vouw de band nu weer terug langs de kant waar je verder gaat naaien. Begin te stikken aan het begin van de hoek en stik weer door tot 2 cm voor de volgende hoek, dan herhaal je het 'biaisband in de hoek' kunstje weer. Als je met je biaisband bij het begin komt, vouw je de twee uiteinden open en naait ze op 1 cm van elkaar vast. Dan kun je de biaisband weer op je quilt leggen en vast stikken.
Fold your tape open an lay it down on the back of your quilt. Start half way along a side. Match up the open side of the bais tape and the dge of your quilt side, right sides together. Pin and sitch close to the edge. Keep stitching until 2 cm before the corner. Fold the tape to the right in a nice 90 degree angle, then fold back to the side wehere you'll continue stitching. Start stitching right in the corner and stitch along the side, close to the edge. 2 cm before the next corner you'll repeat the 'fold bias tape trick' again. keep going until you reach the beginning of your bias tape. Open the beginning and the end of the tape open, completely. Sew them together at 1 cm. After that you can put them on your quilt back again, and stitch them.
Draai je quilt om, zodat de voorkant bovenop ligt. Vouw je biaisband naar voren (helemaal dicht) om de rand heen en speld hem goed vast. De hoekjes kun je nu netjes in puntjes vouwen. Stik rondom, hecht af. En je quilt is klaar!


Turn your quilt around, so the top side is up. Fold your bias tape aroud the edges (closed) and pin well. You can fold the corners niely into pointy tips. Stitch around, cast off and your quilt is finished.
Zo zie je maar, super moeilijk hoeft het niet te zijn als je alle stapjes maar nauwkeurig en langzaam doet. Echt je tijd nemen, is wat mij betreft nog het belangrijkste advies. Ik deed ruim anderhalve week over deze kleine speel quilt, en deed één stapje per keer/avond.
Just to show you, it doesn't have to be that difficult to make a quilt. Just go slowly and be as precise as you can be. Taking your sweet time, is the best advice I can give you. This small play quilt took me a week and a half to make, as I decided to do just one step per evening.
So, nothing went wrong... at all?
Haha, oké... natuurlijk ging er wel wat mis! Ik werd geen quilt-koningin tijdens het maken van één quilt, dus hier komen mijn bloopers!
- Ik naaide over een veiligheidsspeld heen. Geloof me, niet goed voor je naald, niet goed voor je machine.
- In de hoeken naaide ik tot 2x toe (want waarom zou je het na één keer leren) te ver door, waardoor ik de puntjes niet netjes gevouwen kreeg. Wat leidde tot extreem gemopper.
- Tijdens het stikken van de biais band prikte ik tot 3 keer toe in mijn vinger, wat resulteerde in bloed, wat resulteerde in doorstikken minus 3 vingers, want ik wilde natuurlijk geen bloed op die sneeuw witte biaisband krijgen.
- Op slechts één plekje zit er een vouwtje in de quilt. Niemand ziet dat behalve ik, maar daarom moest ik er wel even over mopperen.
Of course things went wrong. I didn't become quilting-queen over night, whilst making one tiny quilt! So, here are my confessions (it's a but like Americas funniest home videos, if you have a proper imagination):
- I stitched across a safety pin. My needle nor sewing machine agrees on this. Yikes!
- Twice ('cause why learn after the first mistake) I stitched too far in the corners, so folding the pointy tips was quite hard. I had to mope.
- During the stitching of the bias tape in the very last step, I managed to prick myself and start bleeding three times. So I had to stitch minus 3 fingers, as I didn't want that white bias all filthy with blood stains (young mums don't appreciate blood stained baby quilts, or so I've read...), More koping was done.
- There's only one little pucker in the quilt, which no one will notice but me. Yet, I had to mope about it.


Maar al met al is mijn quilt zo fijn gelukt. Je kunt hem goed opvouwen en oprollen en hij blijft mooi. De voering zit goed op zijn plek. Hij ziet er echt uit als een klein dekbedje, dus dat is echt tof. Ik ga zeker nog eens een quilt maken. Weer stapje voor stapje en rustig aan. Ik hoop dat jij het met deze tutorial ook aandurft. Veel succes.
But all in all, I am so happy with this little quilt. It's easy to fold and roll, it moves smooth and is so soft. It looks like a proper little duvet, and that makes me quite proud. I am defenately making another quilt at some point. Again, step by step and really slow. I hope this tutorial will help you make your quilt. Enjoy!




simpel maar zeker de moeite waard !!
BeantwoordenVerwijderenMooi! Ik geloof niet dat het iets voor mij is, ben toch meer van de wolletjes :-) Maar het resultaat mag er zeker zijn!!
BeantwoordenVerwijderenLove the colors!! And that's a good fabric show-off pattern--sometimes I feel bad slicing into my pretties, haha. I don't know if you have a walking/even feed foot for your sewing machine, but you can get generic ones and they really seem to help with the quilting part of it.
BeantwoordenVerwijderenAh yes, the walking foot is my precious! I may come up with a similar buildin block technique for a larger quilt (for a queen size bed or something), but I'll first enjoy this small victory!
VerwijderenBedankt voor de uitleg!
BeantwoordenVerwijderenMooi! Dit is echt nog te hoog gegrepen voor mij. Moest wel lachen om wat je schreef over 'de tijd nemen'. Als ik al iets op de naaimachine probeer gaat dat zo ongelooflijk traag, daar hoef ik mijn best niet voor te doen!
BeantwoordenVerwijderenJij maakt niet enkel een quilt maar direct ook een tutorial! Wat knap.
BeantwoordenVerwijderenMisschien dat ik over twee jaar ook nog een quilt maak. Voor nu denk ik, net als jij eerder, 'nooit meer'!
Die van jou is mooi geworden!