My Shop

My Shop
My Shop

Sewing Patterns

Sewing Patterns
Sewing Patterns

Crochet Patterns

Crochet Patterns
Crochet Patterns
Posts tonen met het label tutorial. Alle posts tonen

Crochet tutorial: The Waffle Shrug

Hallo hallo! Het is weer tutorial-tijd! Superleuke reacties kreeg ik afgelopen week weer op mijn shrug. Hij zit ook heerlijk, dus bedankt. Vandaag deel ik met jullie hoe je de shrug maakt. Het is echt een fluitje van een cent, dus sla aan het haken zou ik zo zeggen.

Hello everyone! It's tutorial time! Aww, you guys were very sweet last week about the shrug I made, and I love how snug and warm it is. So thank you! Today I am telling you how to make the shrug. It's really easy, so grab your hooks!


Crochet tutorial: The Waffle Shrug

To avoid mistakes in the pattern I am only writing down the tutorial in English, so nothing gets lost in translation. Alright? Good!

Translation of the crochet terms USA English >> Dutch:
Chain = losse

DC = Stokje
FP DC = Reliëfstokje (bekijk deze video voor uitleg)

What do you need?
- 6 balls of Scheepjeswol Silvi, I chose no.7 but just check out all the fun colors and colorways that are available!
- a 7 and 8 mm hook
- a tapestry needle
- stitch markers

Crochet tutorial: The Waffle Shrug

I USE USA CROCHET TERMS!!

To start:
With your 8 mm hook, chain 70.

Round 1:
DC in 3rd chain from the hook, DC in every stitch.

Measure your work: this should be about 68-70 cm. If it's shorter, unravel round 1 and add some chains. If it's too long, unravel your work and unravel a few chains.

From now on you:
- Start every round with CH3 (counts as one DC)
- End every round with a DC.

The Front post double crochet
From round 2 you'll start working with the 'front post double crochet' (reliëfstokje in Dutch). Normally you crochet through both loops when making a DC. But with a 'front post double crochet' you crochet around they entire stitch. This makes the stitch 'pop up' a little.

If you want to see an example on how to do a 'front post DC', just watch this video, it's really easy. Promise.

I will shorten 'front post double crochet as' FP-DC.

At the end of every round, turn your work.

Okay, let's move on with our shrugs!

Round 2:
Start with Ch3, FP-DC, DC >> Keep alternating FP-DC and DC until the end. Your last stitch is always a DC (no matter what your second to last stitch was).

Round 3:
Start with CH3. Put a FP-DC on all the DC's of round 2 >> Put a DC on all the FP-DC of round 2. End your round with a DC.

Crochet tutorial: The Waffle Shrug

From now on, keep repeating what you did in Round 3. You'll see how a waffle pattern forms. Keep going until you have rectangle of 85 cm long. Fasten off, but leave a long piece of yarn attached.

Before you start making your shrug, block your rectangle. Here you can see how wet blocking your crochet works.

Make your shrug
Fold your rectangle in half, so you have a 42.5 cm x 70 cm rectangle. Take your tapestry needle and sew up the sides 2/3 from bottom to top. Now if you look, you can see the armholes. Fasten off and weave in all the ends.

Crochet tutorial: The Waffle Shrug

Crochet tutorial: The Waffle Shrug

Open up your shrug so the arm holes are in the middle. Fold the collar in the style you like it. Cast on 3 stitches below the armhole seam and SC all around the collar until 3 stitches below the other armhole. Fasten off and weave in your ends. I thought the armholes were nice enough, but if you like you can also SC around the armholes.

Crochet tutorial: The Waffle Shrug

Now, try on your shrug! If you like to shape it a little more, I suggest you block it in the shape you want to wear it. You can wear your shrug with a long sleeved t-shirt or a blouse and attach a nice brooche of you'd like to smarten it up!

Crochet tutorial: The Waffle Shrug

So, will you go on and make a shrug? It's so easy and nice to wear. The waffle pattern also seems to isolate a lot of warmth, so it's a perfect winter garment.

Alright beauties, have fun with it!
9

Bobble stitch infinity scarf - Crochet Tutorial

Find the (FREE!) pattern for the crochet infinity scarf on the brand new Happy in Red website.

Bobble stitch infinity scarf - Crochet Tutorial

23

Tutorial: fabric flower belt


Find the sewing pattern for this flower belt on the new Happy in Red website.


Fabric flower belt tutorial

15

Womens beanie crochet tutorial


Check out the women's crochet beanie pattern on the new Happy in Red website.

Womens beanie crochet tutorial

10

Clasp clutch tutorial

The FREE clasp clutch sewing pattern has moved to the new Happy in Red website. See you there!

Bekijk het naaipatroon beursje op de nieuwe Happy in Red website.


Clasp clutch tutorial


Clasp Clutch


21

Diamond stitch blanket crochet pattern: step by step tutorial

Want to make this crochet rainbow blanket? You can!! The crochet blanket pattern has been MOVED to the new Happy in Red website. I hope to see you there. The pattern is still FREE for you!

Wil je deze gehaakte regenboog deken maken? Dat kan! Het gratis haakpatroon is verhuisd naar de nieuwe website van Happy in Red.


Rainbow blanket, diamond stitch - FREE crochet pattern | Happy in Red


55

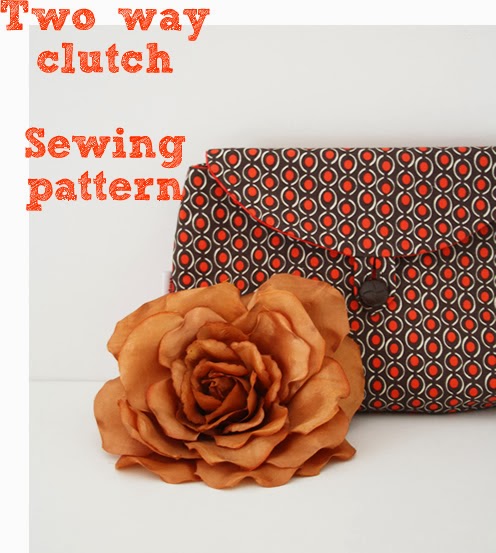
The Two Way Clutch Sewing Pattern


Two Way Clutch Sewing Pattern

The Clutch Sewing Pattern for the Two Way Clutch has moved to the new Happy in Red website.


31

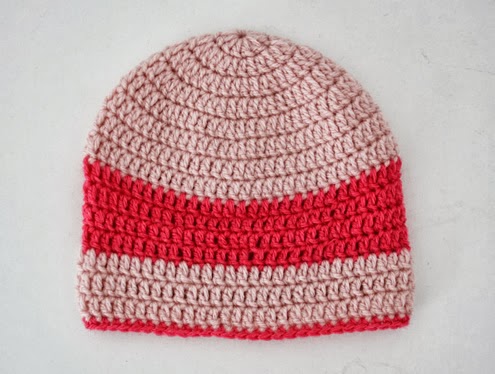
Easy baby beanie crochet pattern

Find the crochet baby hat for beginners on the new Happy in Red website.

Free crochet pattern: baby beanie

16

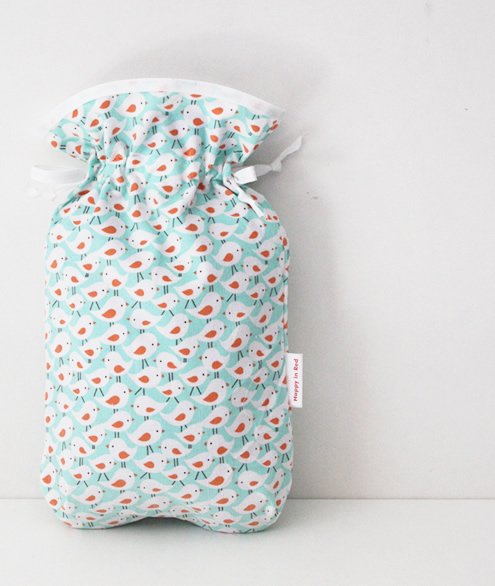
It just makes a nice present

Read the hot water bottle cover sewing pattern on the new Happy in Red website

Hot water bottle cover

8

DIY dress refashion

Geachte heer/mevrouw H&M, mocht u zich afvragen waarom ik geen enorme fan ben van jullie keten... ik licht het bij deze graag toe. Omdat er bij uw winkels altijd (echt áltijd, al kom je 1 minuut na openingstijd binnen zeilen) een enorme rij voor de paskamer staat en dit mij tot zelfmoord beweegt, ben ik nooit (maar dan ook nóóit) geneigd tot passen in uw winkels. Dus als ik dan eens iets leuks zie, neem ik het mee zonder te passen. Ik heb maat Small. Dit betekent dat als ik een kledingstuk maat Small mee neem, dit vaak ook past en geschikt is voor mij. Dus als ik vervolgens voor de spiegel sta in dit kledingstuk en het woord 'Hobbezak' in me opkomt, ben ik niet geamuseerd. Zeg maar.

Dear sir/ madam at H&M, in case you were wondering why I am not a big fan of your chain, hereby I'd like to elaborate. Because there are always (seriously álways, even if you walk in just after opening time) huge lines in front of your changeing rooms, sometimes until the back of the store (and those lines make me think suicidal thoughts), I buy things without thrying them on. Now, I am a Small. This means that if I take home a piece of clothing labelled size Small, this should fit me. So when I try on this size Small at home and the word 'MooMoo' pops up in my head, I am slightly unamused. So to say.

DIY Dress Refashion

Nu kostte uw kledingstuk slechts €3 (ik wil niet wéten hoeveel u uw werknemers in Bangladesh/ India/ China betaalt...) dus terug fietsen om het te ruilen of terug te brengen, vond ik niet de moeite waard. Ik neem aan dat u daar op gokt? Dat mensen te lui zijn om uw goedkope kleding terug te brengen? In ieder geval, u heeft mazzel. Want ik ben in het bezit van een naaimachine en besloot uw goedkope kledingstuk aan te passen, zodat het wél past op maat Small.

Now, your piece of clothing costed me €3 (and I seriously don't want to know what you pay your employees in Bagladesh/ India/ China to make this...) so cycling back to the store and return it, it just wasn't worth the trouble. I guess this is what you count on? That people just don't take the trouble to return their cheap clothing that doesn't fit? Anyway, you're in luck. I am the proud owner of a sewing machine and I am nót afraid to use it. So I will use it to make this 'size Small' actually fit onto a size Small. 


DIY Dress Refashion

Bij deze presenteer ik u bewijsstuk A. De rode jurk kocht ik van u voor €3, hij veinsde maat S te zijn. Maar zoals u kunt zien aan het groene hemdje, dat daadwerkelijk maat S heeft, kunt u zien dat u uw werknemers in Bangladesh/ India/ China werkelijk eens wat meer moet gaan betalen, want zoals u ziet... maat S? Aan mijn hoela!

Wat men dus doet om de jurk wel op maat te maken? Draai de jurk/shirt binnenstebuiten en speld te zijkanten op elkaar. Bepaal hoeveel je de jurk wil innemen en teken dit langs beide zijkanten af, de vorm van de jurk volgend van de oksel tot onder. Ik nam dit shirt zo'n 3 centimeter in aan beide kanten (jawel, ik nam het 6 centimeter in! Maar zoals je ziet 10 cm had ook gekund).

I present you within exhibit A. I bought this red dress for €3 and it acted like it was size Small. But as you can see from the green top that is actually size S... this dress is anything but a size Small. H&M really needs to start paying their employees in China/ Bangladesh/ India better, 'cause Size Small? No way. 

So what you do to resize this dress? You turn it inside out and pin the sides together. Decide how muc you want to take in the dress and draw that on the fabric, from arm pit to the bottom seam whilst follwing the model of the dress. I took in 3 cm of both sides. Yes, I had to take the dress in 6 centimeters (but 10 cm was also possible). Size small? Right...


DIY Dress Refashion

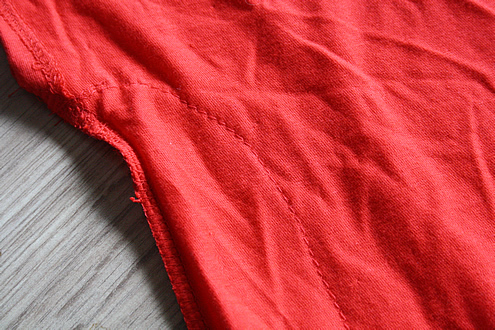
Zo kun je zien hoe ik de vorm van de jurk volgde. Ik heb geen overlocker (anders kun je die natuurlijk lekker roetjs snel gebruiken). Maar ik naaide de stof aan elkaar met een lange steek, zodat de stof lekker kan rekken en strekken. En let op: dit is stretch-achtige stof, dus trek niet aan de stof als je deze stikt, anders gaat het lubberen.

Here you see how I stitched along the shape of the dress. I used a long stitch, so the fabric can stretch like it wants to. This is stretchy fabric, so don't pull it while you're stitching it, otherwise you'll pull it out of shape.


DIY Dress Refashion

Knip de overtollige stof af.

Cut the access fabric.


DIY Dress Refashion

Nu zaten er aan mijn jurk ook lusjes om een koordje doorheen te halen. Ik tekende af waar de lusjes moesten komen en tornde toen de lusje uit de stof die overbleef. Op de plek waar de lusjes moesten komen maakte ik de steekjes even los, deed de lusjes tussen de stof en stikte er weer overheen.

Now, my dress had little loops so I can put a ribbon or little belt through. I drew on the dress where the loops should be. So I used the seam ripper to get the loops from the leftover fabric. I torn stitches of the place where I wanted the loops to be, placed the loops there and stitched them in place.


DIY Dress Refashion


Stretch stof rafelt niet, dus eigenlijk hoef je niet te zigzaggen. Maar de naden zien er wel zo netjes uit als je het wel doet, dus voila. En als je een overlocker hebt, dan is het gemakkelijk natuurlijk.

Stretch fabric doesn't fray, so you don't have to zigzag. But the seams do look better if you do zigzag: so I did. 


DIY Dress Refashion

En dan is het klaar! Nog geen uurtje werk. En goed gelukt. Ik vond het in ieder geval wel de moeite waard. Om die véél te grote jurk van H&M heb ik lang gemopperd, terwijl hij in een hoekje stof lag te vangen. En toen besloot ik toch maar om er iets aan te doen, in plaats van te blijven mokken. En ik ben blij dat ik eraan gedaan heb. Maar het zal jullie niet verbazen: mijn geld geef ik liever niet meer bij H&M uit (zelfs geen stomme €3). Er zijn gewoon te veel redenen om het niet meer te doen!

And then it's finished. It's less than an hour of work. I think it was quite worth refashioning the dress. My oh my did I was pissed off about this way too large H&M dress, it was literally in the corner of my bedroom for a year before I decided to do something about it. But I'm glad I did. But I bet it doesn't surprise you: I rather not spend my money at H&M anymore, not even some lousy €3. There are just too many reasons not to.


DIY Dress Refashion

DIY Dress Refashion

Reden waarom ik deze jurk dan toch kocht (toen ik nog niet beter wist!)... de kleur. Ja, die vond ik echt helemaal geweldig! Staat me supergoed en helemaal met deze zalige blauwe pumps erbij.

Reason why I did buy this dress (when I didn't know ant better!)... the colour. Oh how I love this shade of red, I loved it instantly. It looks good on me, especially with these petrol pumps. 
27

Fat quarter sewing: hot water bottle cover tutorial

The hot water bottle cover sewing pattern has moved to the new Happy in Red website.

Free sewing pattern: hot water bottle cover | Happy in Red

Free sewing pattern: hot water bottle cover | Happy in Red


41

Free sewing pattern: drawstring backpack for kids


Free sewing pattern: drawstring backpack for kids | Happy in Red


Drawstring backpack - tutorial - Happy in Red

Free sewing pattern: drawstring backpack for kids | Happy in Red

Drawstring backpack - Happy in Red - tutorial

Drawstring backpack free sewing pattern, available on the new website by Happy in Red
56

Easy rippled zipper pouch tutorial

Af en toe ben ik net een echt meisje. En dan met name wat betreft tasinhoud. In mijn tas raakt een en ander regelmatig hopeloos verloren. Top 5: mijn sleutels, mobiele telefoon, Labello, mp3-speler (ik heb zo’n klein ding, zeer gevaarlijk) en mijn zonnebril.

Sometimes, I am nothing less than a real girliegirl. Especially when it comes to the contents of my bag. Things seem to get hopelessly lost in there. Top 5 of lost items of all times: my keys, mobile phone, lipgloss, mp3 player (I have a tiny one, very dangerous) and my sunglasses.

Easy rippled zipper pouch tutorial

En dan heb je dus dat je na weken speuren ineens een geplette lipgloss, een kapotte mp3-speler of zonnebril met gebarsten glas onderuit je tas trekt. Dat moet maar een keer gedaan zijn!

So after weeks of digging through your bag you suddenly find a smashed lipgloss, a broken mp3-player or sunglasses with one glass missing. Seriously, I had to put this to an end.

Het werd dus tijd voor een opbergtasje, een veilige met rits. Zodat alle ontsnaplustige spullen gewoon op hun plaats blijven liggen. En een beetje naaister (kuch) gaat dan dus zelf aan de slag. Nu weet ik niet hoe goed jullie al zijn met ritsen, maar ik kan met gewone ritsen inmiddels prima uit de voeten. Over de blinde variant weiger ik het vooralsnog even te hebben.

So it was time for a little purse, as safe one with zipper. So all those nasty things that constantly feel like escaping will be safely locked inside it. And if you know how to work your way around a sewing machine (cough), then you make one yourself. Now I don’t know how you guys feel about zippers, but at the moment I feel rather confident about normal zippers. I however refuse to speak about the blind variety.

Nu had ik niet zo veel zin in een rechttoe rechtaan tasje, maar liever iets met plooitjes. Maar het moest ook beslist niet te moeilijk zijn. En zo werd het gerimpelde ritstasje geboren. Ideaal voor de naaister die snel een leuk tasje in elkaar wil draaien én ideaal voor de beginneling die ritsen heel eng vindt (geen zorg, het hoeft allemaal niet te precies). Hoera.

I didn’t feel like making a standard zippered pouch, I felt like something with pleats. Though, I also was feeling a bit ‘blah’ about a difficult pattern. And that’s how my easy peasy rippled zipper pouch was born. It’s great for the more advanced sewers who just want to sew a quick purse ánd it’s a good project for beginners that feel scared about zippers (don’t worry, you don’t have to be very precise with this pattern).

Oké, het ‘rimpel ritstasje’ patroon met tutorial!
Waarschuwing vooraf: dit ritstasje wordt niet perfect. Het goede nieuws: dat is de bedoeling.

Wat heb je nodig?
Een rits. Die van mij was 22 centimeter lang.
2 stukken stof die flink breder zijn dan je rits. Mijn lappen waren 30x30 centimeter.
2 kleinere stukjes stof: 8 x 5 centimeter.
Bijpassend garen.
Een ritsvoet.
Je naaigerei.

Alright, so here’s my easy rippled zipper pouch tutorial.
A warning before you start: this zipper pouch is not going to look perfect. The good thing is: it isn’t meant to.

What do you need?
A zipper. Mine was 22 centimeters.
2 pieces of fabric: far wider than your zipper. My pieces of fabric measures 30x30 centimeters.
2 smaller pieces of fabric: 8x5 centimeters.
Matching thread.
A zipperfoot.
All you usual sewing gear.


Zipper pouch tutorial

tutorial: zipper pouch

Pak de kleine stukjes stof en strijk deze aan de korte kant een centimeter naar binnen. Plaats de stukjes vervolgens aan de uiteinden van de rits en stik ze vast, over de rits heen.

*Ben je écht lui, dan kun je deze stap zelfs overslaan. Mét deze stap ziet de rits er iets netter afgewerkt uit, maar ach.

Take the short pieces of fabric and iron the short sides a centimeter to the inside. Place them on the ends of your zipper and stitch, right across the zipper.

* If you’re really lazy, you can also skip this step. With this step the zipper looks a bit more finished, but it’s all up to you.


DIY: easy zipper pouch tutorial

Pak nu de twee grote stukken stof. Stik op ¼ centimeter langs één van de randen zónder aan- of afhechten. Herhaal voor het andere stuk stof.

Now take the larger pieces of fabric. Stitch ¼ centimeters along one edge wíthout going back and forwards a few times at the beginning and the end.

Sewing: zipper pouch tutorial

Pak de draadjes aan weerszijden van het lapje stof vast en trek er zachtjes aan. Als het goed is trek je de stof nu naar elkaar toe en ontstaan er rimpels. Herhaal dit voor het andere stuk stof.

Take the pieces of thread on each side of the piece of fabric and pull them softly. You’ll notice how your ‘cropping’ your fabric and it starts to ripple! Repeat this for the other fabric piece.

Easy zipper pouch sewing

Sewing a zipper pouch

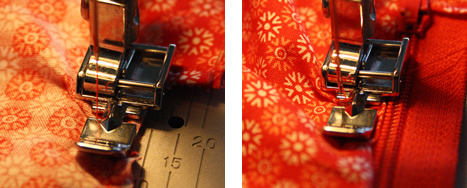
Leg één stuk stof met de goede kant op de goede kant van de rits, plaats de gerimpelde kant tegen de zijkant van de rits. Zet je ritsvoet op je naaimachine en stik de stof vast, vlak langs de rits. Sla de stof om met de goede kant omhoog en stik nogmaals over de stof, vlak langs de rits. Voor extra ‘rimpel-effect’ duw je telkens, vlak voordat je ritsvoetje eroverheen gaat, wat extra stof tegen de rits aan. Herhaal dit met het andere stuk stof.

Put one piece of fabric, good side down, on top of the good side of the zipper. Place the rippled side against the oudside of the zipper. Put your zipper foot on your sewing machine and stitch. Turn the fabric over (the good side is now up) and stitch again. If you want an ‘extra rippled effect’ just push a little fabric towards the zipper foot just before you stitch over it. Repeat with the other pice of fabric.


Rits de rits een stukje open (tot halverwege ongeveer) en vouw de stukken stof tegen elkaar aan, goede kanten op elkaar, en speld vast. Het is nu tijd om te besluiten wat je met de onderkant wilt gaan doen. Ik besloot dat ik geen enorm tasje hoefde, dus knipte zo’n 10 cm van de onderkant af en maakte ronde hoeken met behulp van een bordje. Als je gewoon rechttoe rechtaan hoeken wilt naaien, ook prima natuurlijk.

Zip de zipper halfway open and fold the pieces right sides together and pin in place. It’s time to decide what you want to do about the bottom of the pouch. I decided I wasn’t going to need a huge pouch, so I cut off approximately 10 centimeters from the bottom and made round edges with the help of a saucer. If you want straight edges, that’s fine too of course. 


Naai nu helemaal rondom.

Sew all around.

Zipper pouch sewing tutorial

Je kunt de randjes nu nog afwerken met een zigzag of even bijknippen met de kartelschaar. Je kunt in plaats hiervan natuurlijk ook de overlocker gebruiken. Als je rechte hoekjes in je bodem hebt gebruikt moet je nog even de puntje van je hoekjes knippen.

Now finish the seams with a zagzag or cut them with pinking shears. Of course using your serger instead is also a very good option. If you made straight edges for your bottom, make sure you clip of the corners before you turn the bag inside out.

Easy rippled zipper pouch tutorial

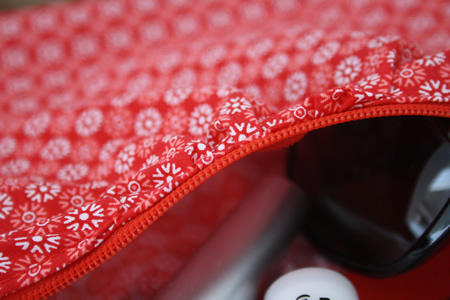
Draai nu binnenstebuiten en taadaa! Je ritstasje is klaar, imperfect en al! 

Now turn inside out and voila, your zipper pouch is ready in all its imperfectness!

Make-up pouch, sunglasses pouch: easy tutorial

Één en al gerimpelde glorie en zo gemakkelijk te maken. Ik zei het toch?

In all its rippled glory, and so easy to make. I told you so!

Rippled zipper pouch: tutorial - Happy in Red

Ik ben nu wel erg benieuwd hoe lang al mijn spullen 'niet kwijt' zullen blijven.

I am really curious though as to how long my stuff will stay 'unlost'.

Thank you Design, dining & diapers for featuring me!
34

Happy Blogiversary Give Away

~This Give Away is now closed. Stay tuned though, in March there'll be another Give Away!~

Precies een jaar geleden begon ik heel voorzichtig en heel stilletjes aan deze blog. Ik maakte eens een fotootje, schreef een klein berichtje en wachtte stilletjes af. En vandaag? Vandaag is Happy in Red 1 jaar oud en ben ik al behoorlijk thuis in het blogwereldje.

Exactly ayear ago I quietly started this little blog. I took some pictures, wrote a little story and just sat there, quietly waiting. And now, 1 year later? It's Happy in Reds 1 year Blogiversay. And I have to say, I feel quite at home in the world of blogs.


Ik ging aan de slag met mijn haaknaald en naaimachine (en met die laatste had ik in het begin echt geen soepele verhouding, maar nu vinden we elkaar héél lief). Wat maakte ik veel hè. Massa's tassen, een heleboel dekentjes en knuffelbeestjes.

I started to learn how to crochet and bought a sewing machine (I had many fights with the latter, but now we get along quite well). I made loads, didn't I? Bags, blankets, softies, the lot!

En jullie reageerden. Massaal! Een jaar geleden had ik nog nooit van volgers gehoord en ik ben zo (zo!) trots (en verlegen) dat jullie trouw naar mijn blogje komen en zulke lieve berichtjes achterlaten.

And you left comments. Loads of them! A year ago I was clueless about followers and now I am so proud and honoured that you all come and visit my blog and leave such lovely comments.

En om jullie te bedanken (ik vond het een topjaar!) geef ik wat weg! Juist ja, een GIVE AWAY!

And to thank you for such a great year, I am giving something away. Yes, you heard it right: A GIVE AWAY!

Twee superleuke boekjes van Cath Kidston: Make and Sew met daarin superleuke projecten, zoals sloffen, t-shirts, tafelkleden en mobils vol vogeltjes.

Two great booklets by Cath Kidston: Make and Sew full with fantastic projects like slippers, t-shirts, table cloths and little bird ornaments.


En omdat die boekjes toch ergens in vervoerd moeten worden, geef ik ook de tas weg die ik maakte voor mijn omkeerbare tas tutorial! Daar kwamen namelijk zo veel leuke reacties op!

And because those booklets have to get sent, I am also giving away the reversible tote bag that I made for my tutorial, since so many of you commented on that!


Dit allemaal winnen?
1) Laat hieronder een berichtje achter
2) Extra kans: volger zijn of worden (maar hoeft niet)
3) Extra kans: deel deze Give Away (bijv. op je blog of via Facebook of Twitter)

Laat één comment per kans achter!
Want to win this all?
1) Just leave me a comment here

2) Extra chance: be a follower or become a follower
3) Extra chance: share this Gove Away (on your blog or on Twitter or Facebook)


Leave one comment per chance!

Volgende week zondag (19 feb) maak ik de winnaar bekend!
Next Sunday (Feb 19th) I'll let you know who the winner is!

Happy Blogiversary to me!!

This Give Away is now closed. Stay tuned though, in March there'll be another Give Away!
247